Crispy Chicken Without Breadcrumbs: Easy, Juicy, and Delicious Homemade Recipe

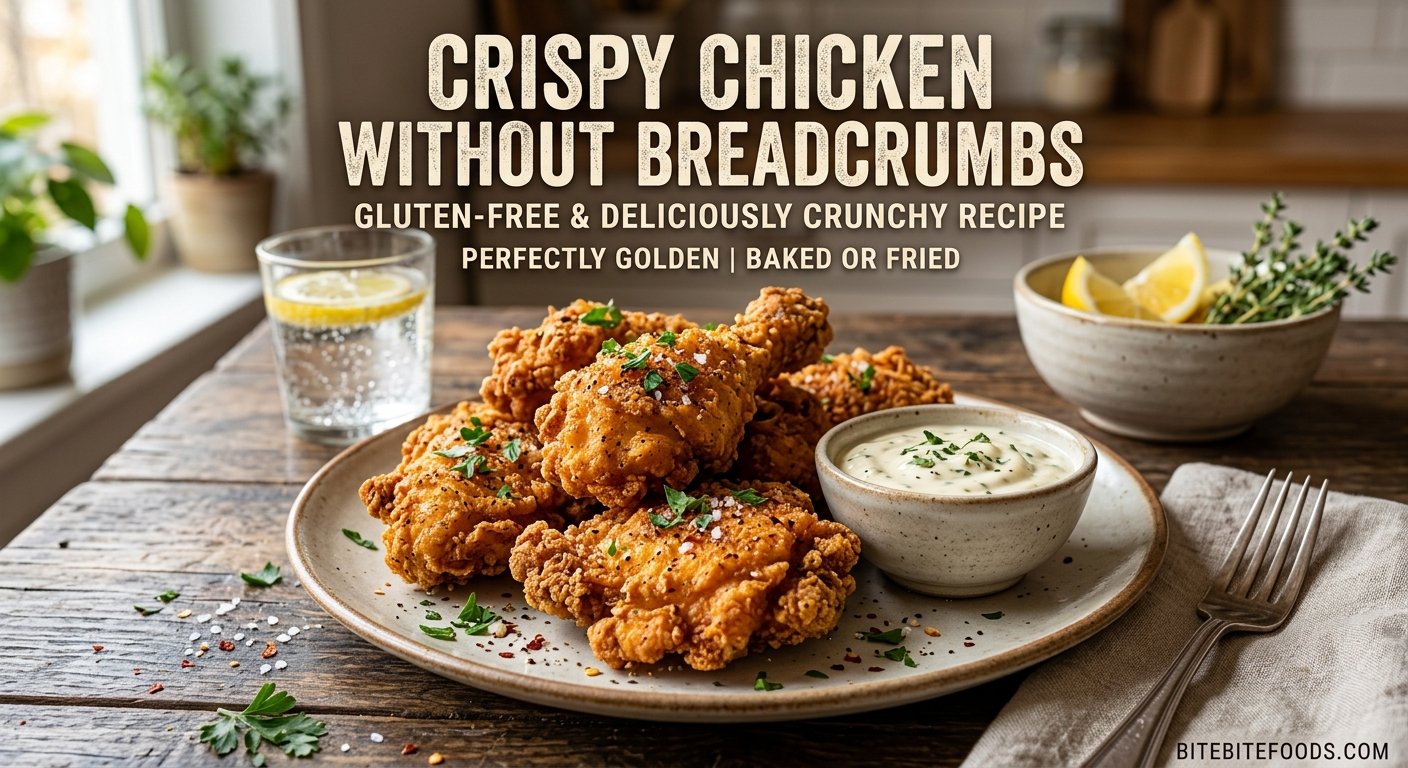
If you love crispy chicken but have run out of breadcrumbs, there is no need to change your dinner plans. You can make crispy chicken without breadcrumbs using simple ingredients that you probably already have in your kitchen. This easy homemade recipe creates chicken with a golden, crunchy coating and tender, juicy meat inside, making it perfect for lunch, dinner, sandwiches, wraps, or a quick snack.
The best part is that you do not need special cooking equipment or complicated ingredients. With a few pantry staples, a little seasoning, and the right cooking technique, you can prepare delicious crispy chicken at home without traditional breadcrumbs.
Whether you are looking for an easy weeknight meal, a homemade alternative to fast food, or a simple chicken recipe for beginners, this recipe is worth adding to your collection. It is affordable, customizable, and easy to prepare with boneless chicken breasts or chicken tenders.
In this guide, you will learn how to make crispy chicken without breadcrumbs, which ingredients work best, how to achieve a crunchy coating, and how to avoid common cooking mistakes.
Why You Will Love This Crispy Chicken Without Breadcrumbs Recipe
There are plenty of reasons to try this easy crispy chicken recipe. It uses basic ingredients, requires minimal preparation, and delivers excellent flavor without relying on store-bought breadcrumbs.
Simple pantry ingredients: You can use all-purpose flour, cornstarch, eggs, and everyday seasonings to create a flavorful coating.
Crispy outside and juicy inside: The right combination of coating ingredients and cooking temperature helps the chicken develop a golden crust while remaining tender.
Easy to customize: Adjust the seasonings to make your chicken spicy, garlicky, smoky, or mildly seasoned for children.
Budget-friendly: Making crispy chicken at home is often more economical than ordering takeout, especially when cooking for the whole family.
Several cooking options: You can shallow-fry the chicken in a skillet or adapt the recipe for an air fryer or oven.
Perfect for different meals: Serve it with roasted potatoes, rice, fresh salad, steamed vegetables, or homemade dipping sauces.
This recipe is particularly useful when you want crunchy chicken but do not have breadcrumbs available. Instead of rushing to the grocery store, you can use flour and cornstarch to make a satisfying alternative.
What Makes Chicken Crispy Without Breadcrumbs?
Traditional crispy chicken often uses breadcrumbs or panko to create a crunchy outer layer. However, breadcrumbs are not the only way to achieve a crisp texture.
For this recipe, a mixture of all-purpose flour and cornstarch creates the coating. Flour provides structure and helps the seasoning stick to the chicken, while cornstarch helps produce a lighter, crispier surface.
Egg acts as a binding ingredient, allowing the flour mixture to adhere more effectively. Seasonings add flavor without making the recipe complicated.
Another important factor is moisture. If the chicken is excessively wet, the coating can become sticky or fall off during cooking. Patting the chicken dry before coating it helps create a better result.
Finally, the cooking temperature matters. Oil that is too cool can leave the coating greasy, while excessively hot oil can brown the outside before the chicken cooks through.
When you combine the right ingredients with proper cooking techniques, you can make delicious crispy chicken without using breadcrumbs at all.
Ingredients for Crispy Chicken Without Breadcrumbs
This recipe makes approximately four servings, depending on the size of the chicken pieces.
Ingredients
- 1 pound boneless, skinless chicken breasts or chicken tenders
- 1/2 cup all-purpose flour
- 1/4 cup cornstarch
- 1 large egg
- 1/2 teaspoon garlic powder
- 1 teaspoon paprika
- 1/2 teaspoon onion powder
- 1/2 teaspoon salt, or to taste
- 1/2 teaspoon black pepper
- 1/4 teaspoon chili powder, optional
- 2–4 tablespoons cooking oil for shallow frying, as needed
You may already have most of these ingredients in your pantry. If you do not have chicken tenders, simply slice boneless chicken breasts into evenly sized strips.
Ingredient Substitutions
Cornstarch: Cornstarch helps create a crisp coating. If you do not have it, you can use additional flour, although the texture may be slightly different.
Paprika: Smoked paprika adds a deeper flavor, while regular paprika gives the chicken a mild, pleasant color.
Egg: If you cannot use eggs, try a thin coating of plain yogurt or milk as an alternative binder. The coating may behave differently, so add the flour mixture gradually.
All-purpose flour: A suitable gluten-free flour blend may work, but the final texture can vary by brand. For a gluten-free meal, make sure every ingredient is labeled gluten-free and avoid cross-contact with regular flour.
Seasonings: You can replace the listed spices with your favorite chicken seasoning blend. Check the salt content if using a prepared blend.
How to Make Crispy Chicken Without Breadcrumbs
Follow these straightforward steps to prepare golden, flavorful chicken at home.
Step 1: Prepare the Chicken
Start by cutting the chicken into evenly sized strips or small cutlets. If you prefer chicken nuggets, cut the meat into bite-sized pieces.
Use paper towels to pat the chicken dry. Removing excess surface moisture helps the coating stick and encourages better browning.
If you are using chicken breasts, try to keep the pieces similar in thickness. Uneven pieces may cook at different rates, leaving smaller pieces dry while thicker pieces are still undercooked.
Wash your hands and clean any surfaces that come into contact with raw chicken.
Step 2: Mix the Dry Ingredients
In a medium bowl, combine the all-purpose flour, cornstarch, garlic powder, paprika, onion powder, salt, black pepper, and optional chili powder.
Stir until the ingredients are evenly distributed.
This seasoned flour mixture provides the main structure of the crispy coating. Cornstarch helps lighten the texture, while garlic, paprika, and onion powder add flavor to every bite.
Taste the dry mixture only if it contains no raw chicken or other contaminated ingredients. Never taste uncooked chicken or a coating mixture that has touched raw poultry.
Step 3: Prepare the Egg Mixture
Crack the egg into a separate shallow bowl and beat it with a fork until the yolk and white are fully combined.
The egg helps the seasoned flour adhere to the chicken. Using separate bowls for the egg and flour mixture also makes the coating process easier and less messy.
For a slightly thinner binder, you can add one tablespoon of water to the beaten egg.
Step 4: Coat the Chicken
Dip each piece of chicken into the beaten egg, allowing the excess to drip back into the bowl.
Next, place the chicken in the seasoned flour mixture. Turn each piece until it is coated on all sides.
Gently press the flour mixture onto the surface so it adheres evenly. Shake off any loose excess coating before cooking.
For a thicker crust, you can dip the chicken in the egg and flour mixture a second time. However, avoid creating a very thick, wet layer because it may become heavy instead of crispy.
Place the coated pieces on a clean plate or tray while you finish preparing the remaining chicken.
Step 5: Heat the Oil
Add enough cooking oil to cover the bottom of a large skillet. Heat it over medium to medium-high heat.
The oil should be hot enough to brown the coating steadily without burning it. If you have a kitchen thermometer, aim for approximately 350°F (175°C) for shallow-frying.
Avoid adding the chicken to cold oil. The coating can absorb excess oil and become greasy before it develops a crust.
Do not fill the skillet with too many chicken pieces at once. Crowding lowers the oil temperature and creates steam, which can prevent the coating from becoming crisp.
Step 6: Cook Until Golden and Crispy
Carefully place the coated chicken pieces into the hot skillet in a single layer.
Cook the chicken strips for approximately 3–5 minutes per side, depending on their thickness. Larger or thicker pieces will need more time.
Turn the chicken when the first side is golden brown and releases easily from the skillet. Avoid moving the pieces repeatedly, as this can disturb the coating.
If the outside browns too quickly, lower the heat slightly so the inside has time to cook.
The chicken is ready when the coating is golden and the thickest part reaches an internal temperature of 165°F (74°C), measured with a food thermometer.
Transfer the cooked chicken to a wire rack to drain briefly. A rack allows air to circulate around the coating and helps prevent the bottom from becoming soggy.
Step 7: Rest and Serve
Let the chicken rest for a few minutes before serving. This short resting period allows the juices to settle and makes the pieces easier to handle.
Serve your homemade crispy chicken while it is warm and crunchy.
You can enjoy it with ketchup, garlic sauce, ranch dressing, spicy mayonnaise, or a simple yogurt dip. For a complete meal, add rice, potatoes, vegetables, or a fresh green salad.
Tips for Making Extra Crispy Chicken Without Breadcrumbs
A few small adjustments can make a noticeable difference in the final texture.
1. Use Cornstarch in the Coating
One of the easiest ways to improve crispiness is to combine flour with cornstarch. The mixture creates a lighter crust than flour alone in many fried-chicken preparations.
You do not need to use a large amount. The ratio in this recipe provides a practical starting point for home cooking.
2. Keep the Chicken Pieces Even
Cutting the chicken into similar-sized pieces helps everything cook at a similar rate. This is especially important when making chicken strips or nuggets.
Uniform pieces also make it easier to monitor cooking time and prevent smaller pieces from drying out.
3. Do Not Skip the Drying Step
Excess water on the chicken can interfere with the coating. Patting the surface dry before dipping the pieces in egg helps the flour mixture cling more effectively.
4. Avoid Overcrowding the Pan
Cook the chicken in batches if necessary. Leaving enough space between pieces helps maintain the oil temperature and allows moisture to escape.
If you are cooking several batches, keep the finished chicken on a wire rack in a warm oven until serving. Avoid covering it tightly, as trapped steam can soften the coating.
5. Let the Coating Set Briefly
After coating the chicken, allow it to rest on a tray for about 5 minutes before frying. This gives the coating a little time to adhere.
Do not leave raw chicken at room temperature for extended periods. Refrigerate it if preparation or serving is delayed.
6. Use a Thermometer
Golden color alone does not guarantee that chicken is fully cooked. Check the thickest part of each piece and ensure it reaches 165°F (74°C).
This is especially important when preparing thick chicken breasts or unevenly sized pieces.
Can You Make Crispy Chicken Without Breadcrumbs in an Air Fryer?
Yes. You can adapt this recipe for an air fryer if you prefer to use less oil.
Prepare and coat the chicken as described above. Lightly spray the coated pieces with cooking oil, then arrange them in a single layer in the air fryer basket.
Preheat the air fryer if your appliance recommends it. Cook at approximately 380°F (193°C), turning the chicken halfway through.
Thin strips may take around 10–15 minutes, while thicker pieces may need longer. Cooking times vary depending on the appliance and the size of the chicken, so always check that the thickest part reaches 165°F (74°C).
Avoid stacking the chicken or overcrowding the basket. Air needs to circulate around the pieces to help the coating brown.
The result may be slightly different from traditionally fried chicken, but an air fryer can still produce a flavorful, crisp exterior without breadcrumbs.
How to Make Crispy Chicken Without Breadcrumbs in the Oven
Oven-baked crispy chicken is another convenient option, particularly when you want to prepare several servings at once.
Preheat your oven to 425°F (220°C). Line a baking sheet with parchment paper if appropriate for your pan and product instructions, or use a lightly oiled baking tray.
Prepare the chicken and coat it with the egg and seasoned flour mixture. Arrange the pieces in a single layer with space between them, then lightly spray or brush the coating with oil.
Bake until the coating is golden and the chicken reaches an internal temperature of 165°F (74°C). Thin strips may take approximately 15–25 minutes, but thicker pieces can take longer. Turn the pieces halfway through if needed for more even browning.
Because ovens differ, use the temperature and appearance as guides rather than relying on time alone.
For a crispier result, use a wire rack designed for oven cooking over the baking sheet, if available. This allows hot air to circulate beneath the chicken.
What to Serve With Crispy Chicken Without Breadcrumbs
This chicken is versatile enough to pair with many side dishes.
Roasted potatoes: Crispy potato wedges make a satisfying side for a casual family dinner.
Steamed rice: Serve the chicken over rice with vegetables for a simple, filling meal.
Fresh salad: Lettuce, cucumber, tomatoes, and a light dressing balance the richness of the crispy coating.
Coleslaw: Creamy or vinegar-based coleslaw adds a refreshing contrast.
Vegetable sides: Broccoli, carrots, green beans, and mixed vegetables are easy options.
Sandwiches and wraps: Slice the cooked chicken and add it to a bun or tortilla with lettuce, tomatoes, cheese, and your favorite sauce.
Dipping sauces: Garlic yogurt sauce, honey mustard, barbecue sauce, and sweet chili sauce all pair well with crispy chicken.
For an easy weeknight dinner, combine chicken strips with roasted potatoes and a simple salad. This gives you a balanced meal without requiring several complicated recipes.
Flavor Variations to Try
Once you understand the basic recipe, you can change the seasoning to suit your preferences.
Spicy Crispy Chicken
Add extra chili powder, cayenne pepper, or crushed red pepper to the flour mixture. Adjust the amount according to your preferred heat level.
Serve with a cooling yogurt dip or a mild salad dressing.
Garlic Crispy Chicken
Increase the garlic powder slightly and add a pinch of dried parsley. This version works particularly well in sandwiches and wraps.
Smoky Paprika Chicken
Use smoked paprika instead of regular paprika. It gives the coating a deeper, smoky flavor without requiring a grill.
Lemon Pepper Chicken
Season the flour mixture with lemon pepper seasoning. Add a small squeeze of fresh lemon juice after cooking for a bright finish.
Avoid adding too much liquid to the coating itself, as excess moisture may affect crispiness.
Mild Family-Friendly Chicken
Leave out the chili powder and use a simple combination of garlic powder, onion powder, paprika, salt, and black pepper.
This mild version is easy to serve with potatoes, rice, or vegetables.
Common Mistakes to Avoid
Even a simple chicken recipe can be disappointing if a few important details are overlooked.
Using wet chicken: Excess moisture makes it harder for the coating to stick. Pat the chicken dry before beginning.
Skipping the cornstarch: Flour alone can still work, but the texture may be less light and crisp.
Cooking in cold oil: The coating may absorb oil instead of browning properly.
Using excessively hot oil: The outside can burn before the center cooks. Adjust the heat when the coating browns too quickly.
Overcrowding the pan: Too many pieces lower the temperature and trap moisture.
Turning the chicken too early: Give the first side enough time to develop a crust before turning.
Cutting into thick pieces without checking: The outside may look ready while the center remains undercooked. Use a food thermometer.
Covering the finished chicken tightly: Trapped steam can soften the crust. Use a wire rack and serve promptly for the best texture.
Avoiding these common mistakes makes it easier to prepare crispy chicken that is flavorful, evenly cooked, and enjoyable.
How to Store and Reheat Leftover Crispy Chicken
If you have leftover chicken, allow it to cool slightly and place it in a shallow, airtight container. Refrigerate within two hours of cooking, or within one hour when the surrounding temperature is above 90°F (32°C).
Properly refrigerated cooked chicken should generally be used within 3–4 days.
For longer storage, freeze the chicken in a freezer-safe container or bag. For the best quality, use it within a few months.
To reheat, use an oven or air fryer to help restore the crisp coating. Place the chicken in a single layer and heat until it is thoroughly hot, reaching 165°F (74°C).
A microwave can warm the chicken quickly, but it may soften the coating. If you use a microwave, finish the chicken in a hot oven or air fryer when possible.
Do not leave cooked chicken at room temperature for extended periods, and discard any leftovers that have been stored unsafely.
Frequently Asked Questions
1. Can I make crispy chicken without breadcrumbs and flour?
Yes. You can use cornstarch alone or try a suitable gluten-free coating mix. The flavor and texture may differ from the flour-and-cornstarch version, so adjust the cooking method as needed.
2. What is the best substitute for breadcrumbs in crispy chicken?
Cornstarch and all-purpose flour are useful alternatives. A mixture of the two creates a seasoned coating that can become golden and crisp when cooked properly.
Other options include crushed cornflakes, finely ground oats, or crushed crackers, although these ingredients may still resemble or function as crumb coatings.
3. Can I make crispy chicken without breadcrumbs and eggs?
Yes. You can use a thin layer of plain yogurt or milk to help the seasoned flour adhere. You may need to adjust the quantity to prevent the coating from becoming too wet.
4. Why is my crispy chicken coating falling off?
The chicken may be too wet, the coating may not have adhered properly, or the pieces may be moved too soon during frying. Pat the chicken dry, press the coating gently onto the surface, and allow it to set briefly before cooking.
5. Is crispy chicken without breadcrumbs healthier?
It depends on the ingredients, portion size, and cooking method. Removing breadcrumbs does not automatically make chicken healthier, especially if you replace them with another refined starch.
Air frying or baking with a small amount of oil can reduce added fat compared with deep-frying, although the nutritional result depends on the complete recipe.
6. Can I use frozen chicken?
Thaw chicken safely in the refrigerator before using this particular recipe. Pat it dry after thawing so the coating can adhere properly. Do not thaw raw chicken on the kitchen counter.
7. Can I prepare the chicken ahead of time?
You can cut and season the chicken ahead of time and refrigerate it in a covered container. For the best coating, dip the chicken in the egg and flour mixture shortly before cooking.
Cooked chicken can also be prepared in advance and reheated, although freshly cooked chicken generally has the crispiest texture.
8. How do I know when the chicken is cooked?
Use a food thermometer to check the thickest part. Chicken should reach an internal temperature of 165°F (74°C). Do not rely solely on the coating’s color.
Nutrition Information
The nutritional value of crispy chicken without breadcrumbs depends on the cut of chicken, the amount of flour and egg used, the oil absorbed during cooking, and the serving size.
Chicken provides protein, while the flour and cornstarch contribute carbohydrates. Cooking oil adds fat and calories.
For a more accurate estimate, calculate nutrition using the exact ingredients and quantities you use, then divide the total by the number of servings. Remember that some coating may remain unused in the bowl, while some oil may be absorbed during frying.
If you are tracking calories or other nutrients, weighing the ingredients and measuring the cooking oil can help improve accuracy.
Final Thoughts
Making crispy chicken without breadcrumbs is easier than many people expect. With chicken, flour, cornstarch, egg, and a few everyday seasonings, you can prepare a golden coating and tender, juicy chicken without buying a special breading mix.
The most important steps are to dry the chicken properly, coat it evenly, maintain the right cooking temperature, and avoid overcrowding the pan. You can also adapt the recipe for an air fryer or oven if you prefer a different cooking method.
Serve the finished chicken with potatoes, rice, salad, vegetables, or your favorite dipping sauce for a simple homemade meal. Experiment with garlic, paprika, lemon pepper, or chili powder to discover your favorite flavor.
The next time you are craving crunchy chicken but have no breadcrumbs in the pantry, give this easy recipe a try. It is a practical, delicious way to turn basic ingredients into a satisfying family meal.
SEO Title: Crispy Chicken Without Breadcrumbs – Easy Homemade Recipe
Meta Description: Learn how to make crispy chicken without breadcrumbs using flour, cornstarch, egg, and simple seasonings. Includes frying, air fryer, and oven methods.
Suggested URL Slug: crispy-chicken-without-breadcrumbs
Primary Keyword: Crispy chicken without breadcrumbs
Related Keywords:
- Easy crispy chicken recipe without breadcrumbs
- How to make crispy chicken without breadcrumbs
- Fried chicken without breadcrumbs
- Crispy chicken without breading
- Chicken coating without breadcrumbs
- Air fryer crispy chicken without breadcrumbs
- Homemade crispy chicken strips
- Oven-baked crispy chicken without breadcrumbs